3 Settings and preparation
3.1 Camera and tripod settings and preparation
To obtain the best picture quality for model reconstruction, we need an optimal combination of the light sensibility of the sensor (ISO), the duration of exposure and the focal of the objective (F). As mentioned, it is preferable to use a fixed lens (one that doesn’t allow zooming) to facilitate the model reconstruction in the processing step because the software can’t take zooming into account in the reconstruction process. Maximizing the light source allows us to use the lowest ISO to get crisper images. Adjust the time exposure to allow the right amount of light to go to the sensor, avoiding low key and high key photos (i.e., under/over exposed photos). This may be adjusted according to the subject (light or dark colored subject or background) or if different lighting conditions are used.
A flexible tripod (Figure 3.1) can be used to easily and quickly adjust several camera heights (high, middle, and low) close to the subject. If this option cannot safely support your camera and prevent its movement during the shooting, opt for a rigid collapsible tripod, as it is crucial to avoid camera movement, especially during focus bracketing (Figure 3.2).

Figure 3.1: Flexible tripod.
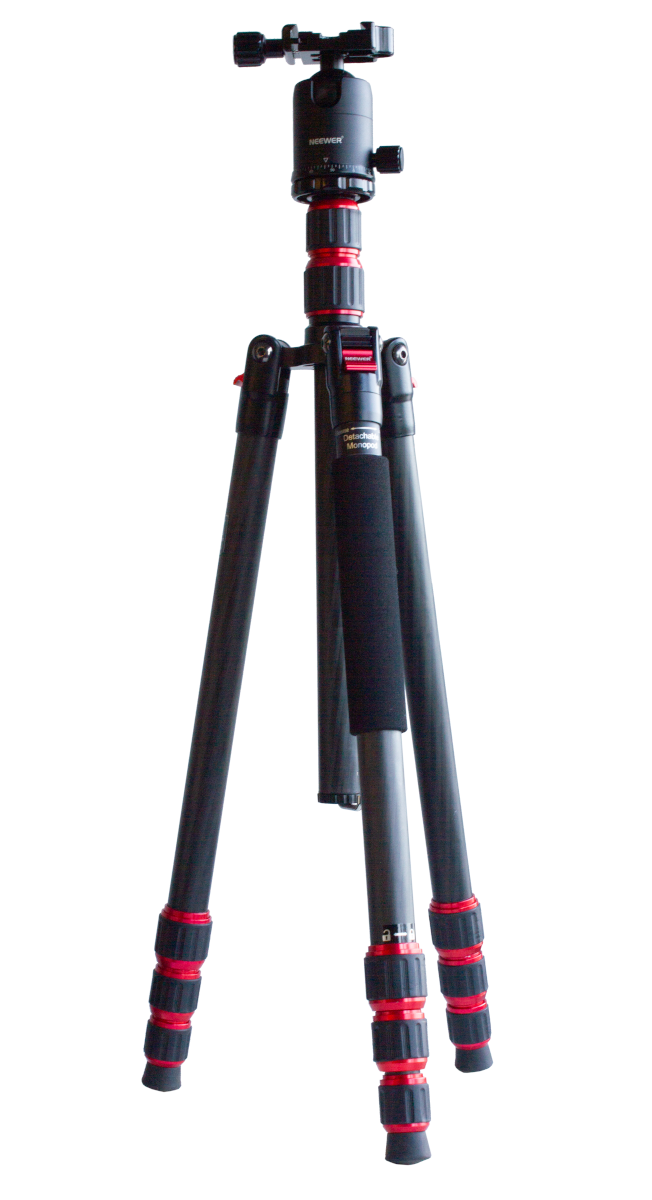
Figure 3.2: Collapsible tripod.
3.1.1 Camera settings
The standard settings have to be adjusted depending on the flower (mostly colour and conditions).
3.1.1.1 Without focus stacking
If not doing focus stacking, we often use the following settings: M (Manual Exposure) mode dial, 1/20s exposure time (shutter speed), F/16 aperture, ISO 100, and standard exposure on the light meter. Using the “Manual Exposure” on the camera dial and setting the focal F to F16 will maximize the depth of field without lowering the image quality.
Use the manual focus setting on the side of the lens (Figure 3.3) to avoid camera trigger malfunction when the flower doesn’t land on the detector. If the focus setting is set to automatic and the flower is off centered during rotation, the camera might not be able to focus (on the background) and thus, prevent the camera trigger. On manual, the camera will always be triggered by the turntable, even if the focus isn’t optimal.
Because the subject is moving and may be off centered on the turntable, the focus may need to be adjusted while the turntable runs. For this you can pause the turntable, manually adjust the focus, and resume the spin.
In general, we save pictures as RAW files (ML setting on the camera display) to be able to post-process them for color calibration (Figure 3.4). A RAW photo of the color chart with an identical set of lighting conditions and camera settings as the flower to be photographed is needed for each flower photos series. If several flowers are processed one after the other without variation of light conditions, only one chart photo is needed.
The nicer and the sharper the photographs, the easier it will be to build the models. So make sure that the flower is always in focus. Shade or high light reflectance can also impair model reconstruction, so pay attention to these while taking the pictures.
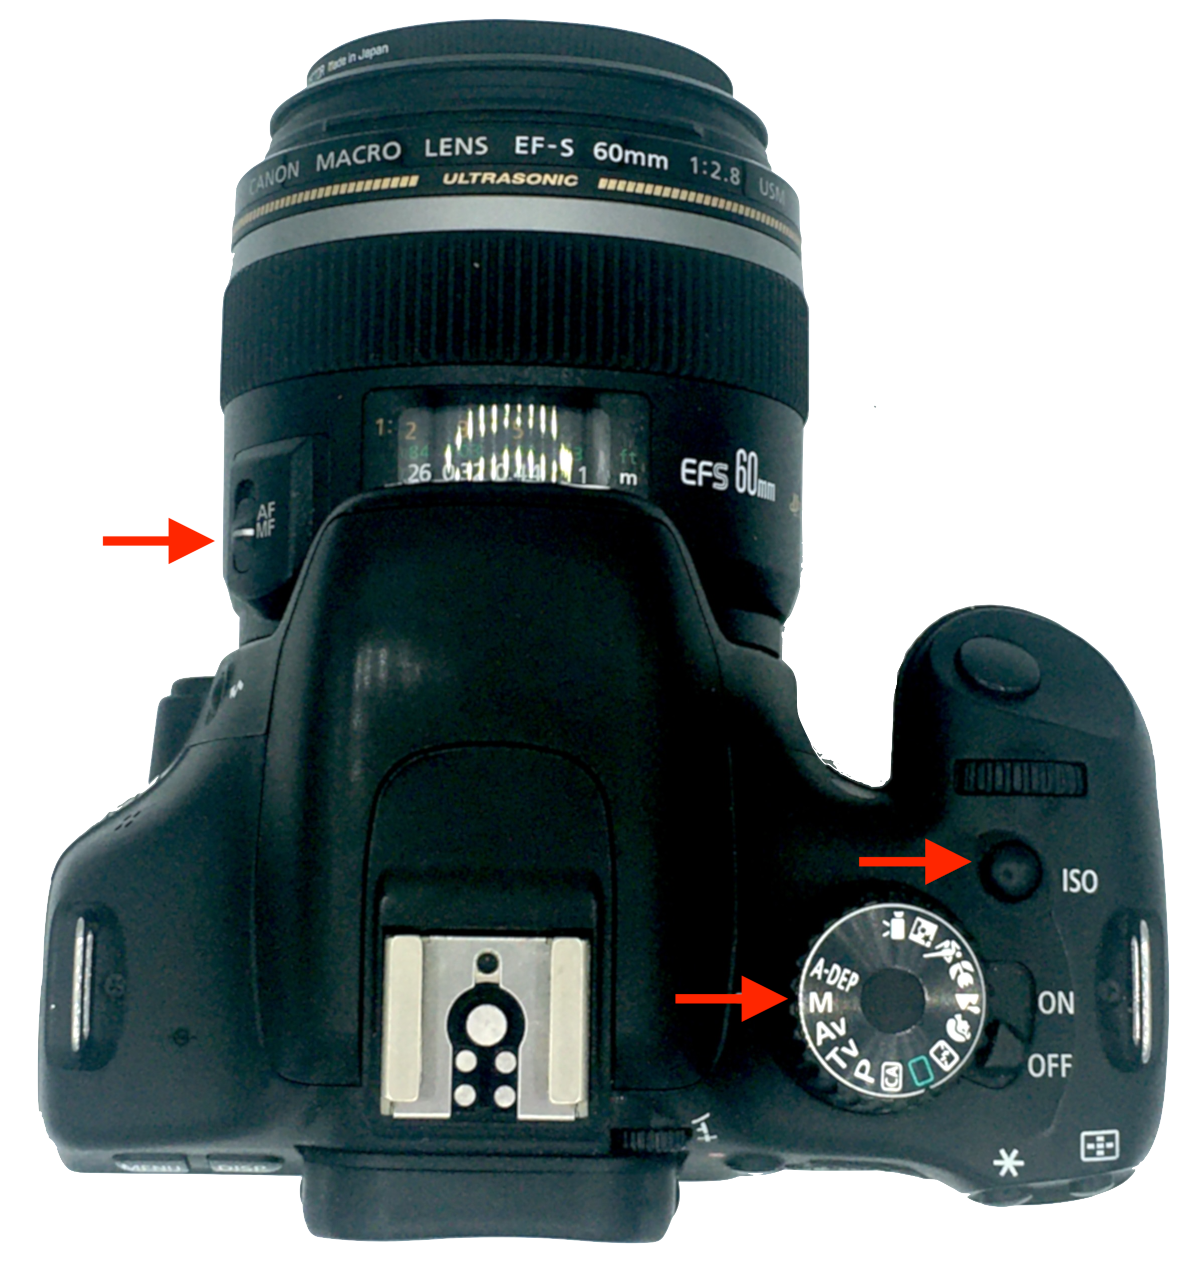
Figure 3.3: Camera (Canon T2i/550D) and lens (60mm f/2.8 Macro lens) used to take RAW photos. The red arrows (from top to bottom) depict the button to get manual focus, the ISO button and the Manual Exposure mode dial.
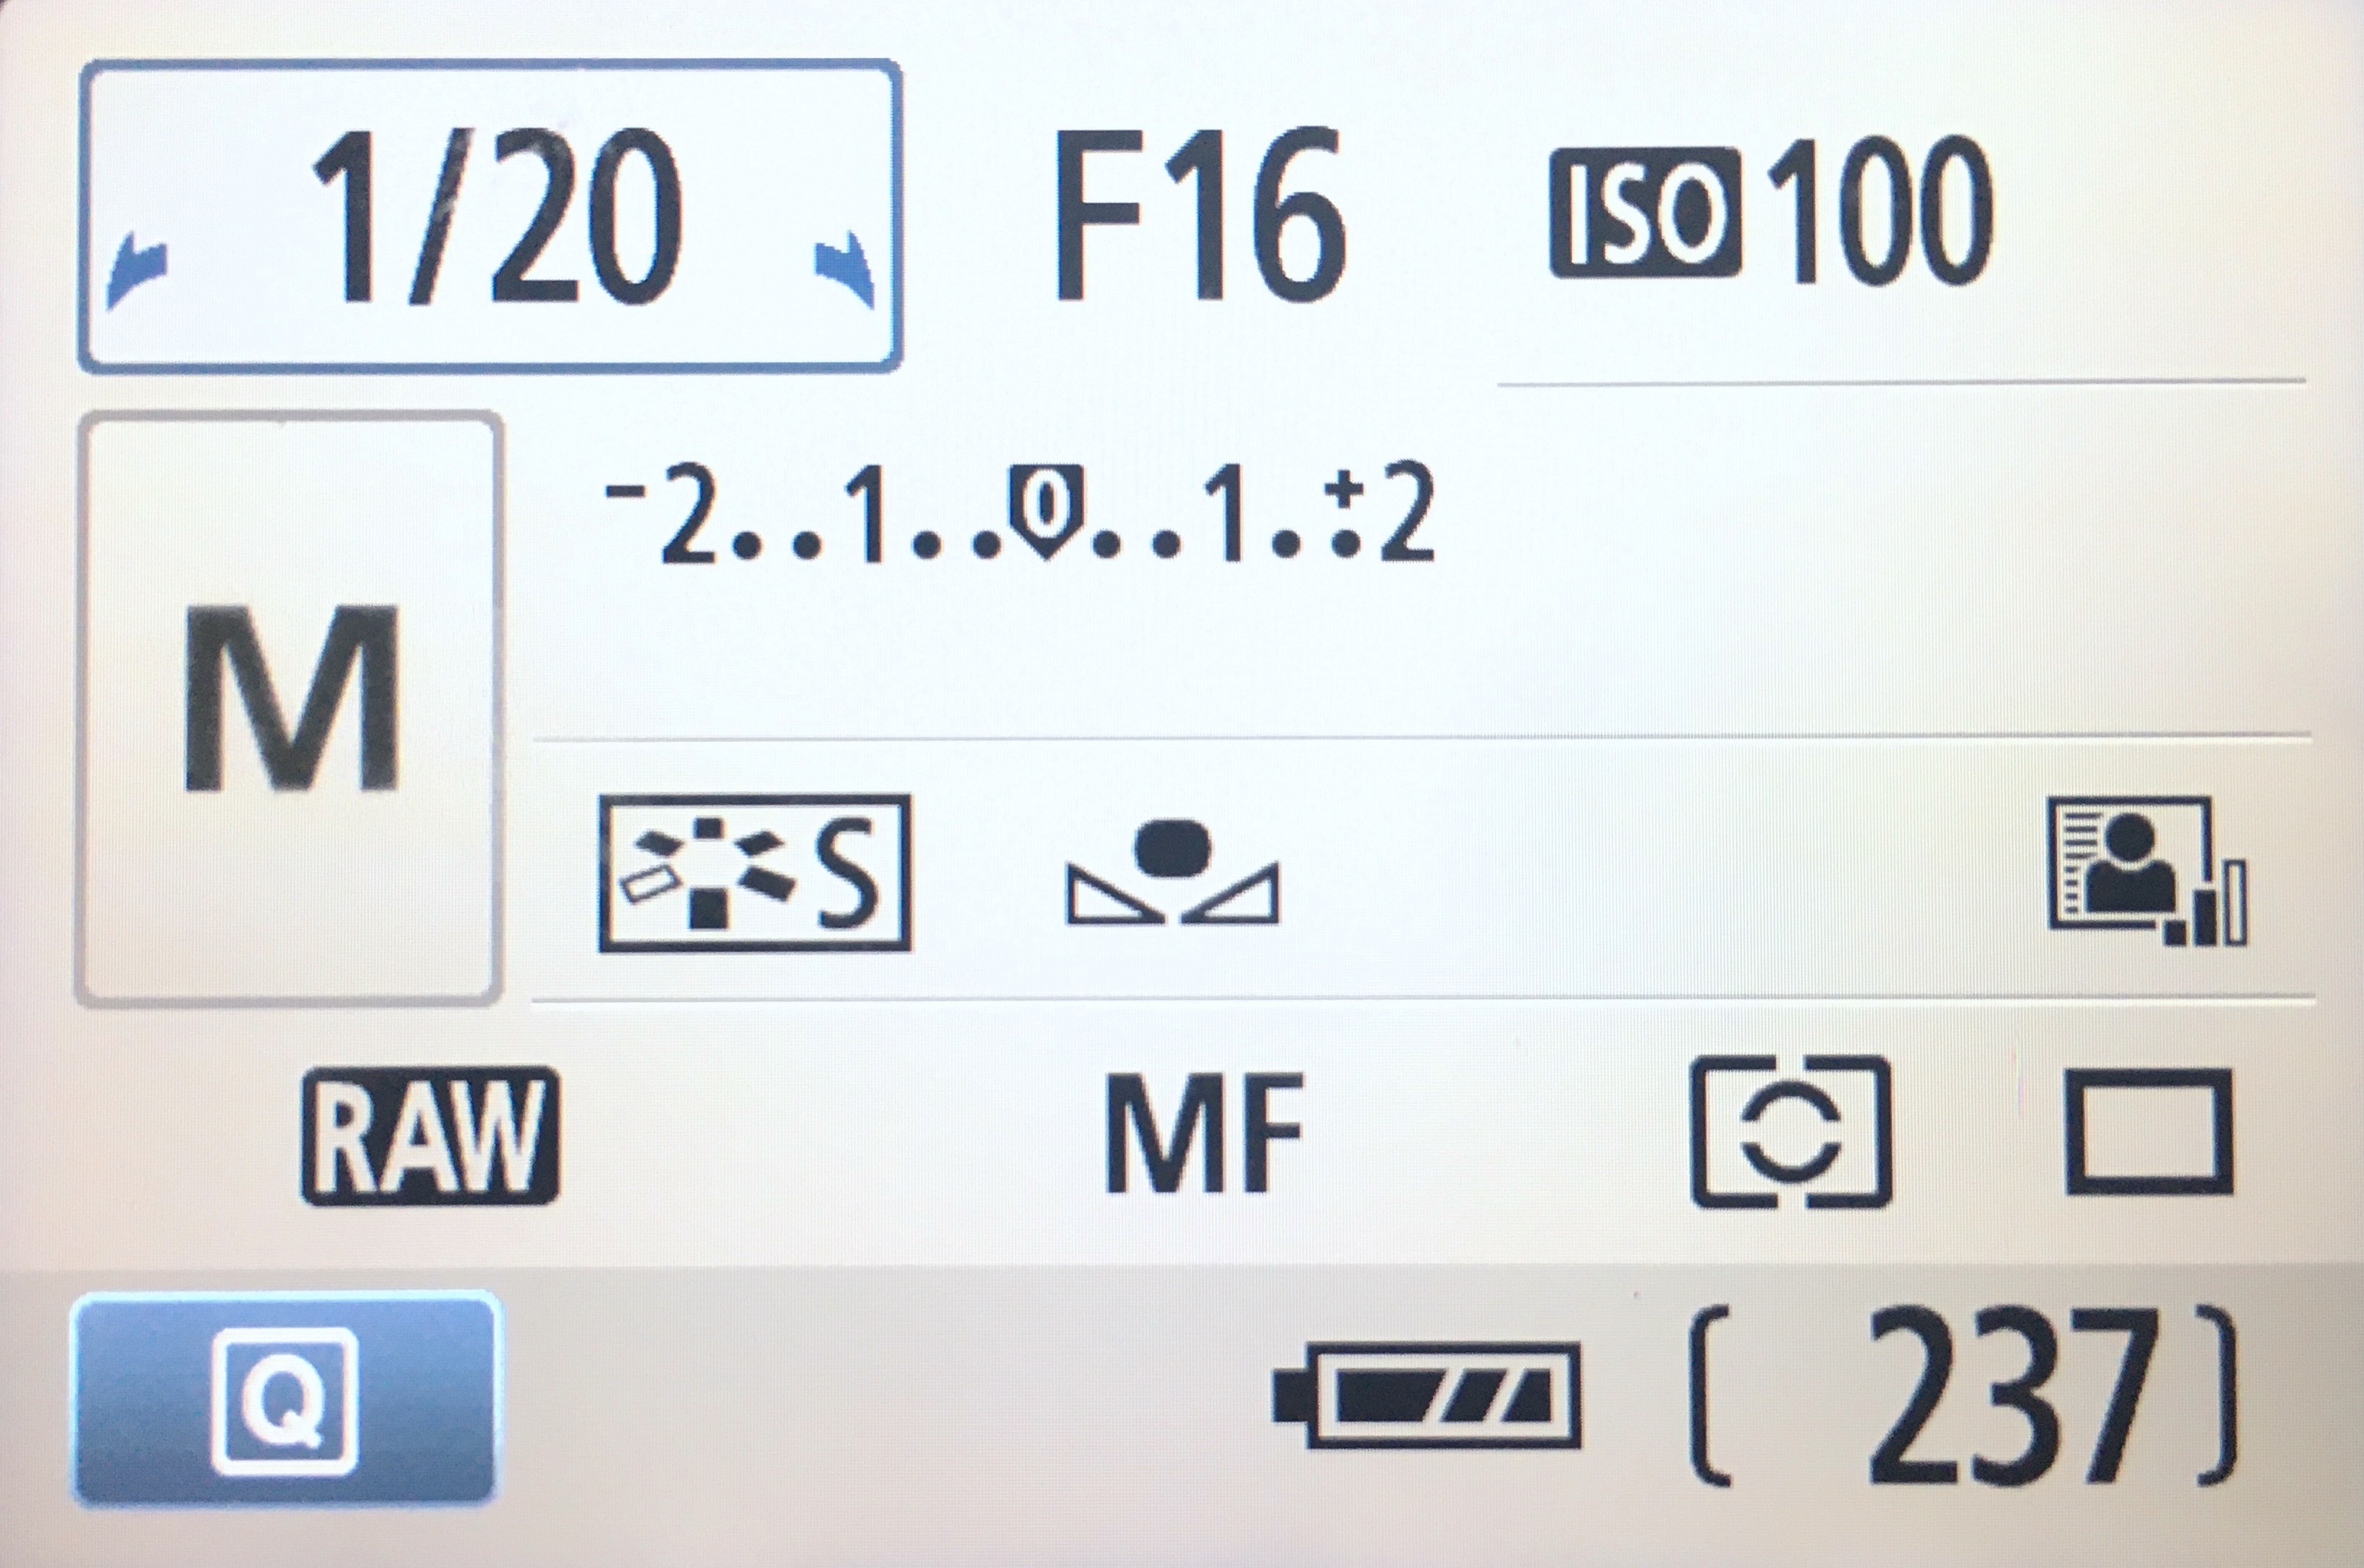
Figure 3.4: Camera settings interface of the Canon t2i/550D (no focus stacking).
3.1.1.2 With focus stacking
If you decide to do focus stacking for your project, check the manual of your camera for optimal parameters during focus bracketing as they may slightly differ from what we use. For a Canon EOS 90D camera, we use the following settings: M (Manual Exposure) mode dial, 1/20 exposure time, F/11 aperture, ISO 100, Auto Focus (AF) lens focus mode, RAW image format (Figure 3.5, Figure 3.6).We usually use the Zone AF method and enable Continuous AF (On the camera screen, Shooting Menu, Tab 6).
Turn off the Image Review option (On the camera screen, Shooting Menu, Tab 1) to prevent delays after taking each set of pictures. To enable focus bracketing on EOS 90D, press the “START-STOP” button to enter the Live View Shooting Mode, then enable Focus Bracketing (On the camera screen, Shooting Menu, Tab 5). If using an EF 100mm f/2.8L MACRO IS USM lens, disable Exposure Smoothing (option within Focus Bracketing), otherwise it may cause changes in image brightness.
The optimal number of shots and focus increments depend on the size of the flower, as well as its position and distance from the camera (Figure 3.7). For example, from the highest camera position, 8 images with a focus increment of 4 works good for a ~2.5x1x1cm (LxWxH) tubular flower, but from an en-face camera angle (i.e. the flower opening facing the camera), 10-12 images with a focus increment of 3 may work better. Test what parameters would produce the smallest number of shots with each part of your flower in focus in each case. Generally, the higher the number of shots, the smaller the focus increments can be.
If the camera fails to capture all parts of the flower in focus, the turntable can be paused to make the appropriate adjustments. This may be the number of shots and focus increments, and/or the starting focal point, which should ideally be on the flower part nearest to the lens. Following the adjustment, the spin may be resumed to continue with image capturing. To save time, optimize the number of shots and focus increments from the start to avoid adjustments during image capturing, and help the camera focus by tapping on the part of the flower nearest to the lens after each rotation, before the camera is triggered. This part will be in focus in the first image taken at each rotation point, while the focus will gradually shift to points further from the lens with each subsequent image.
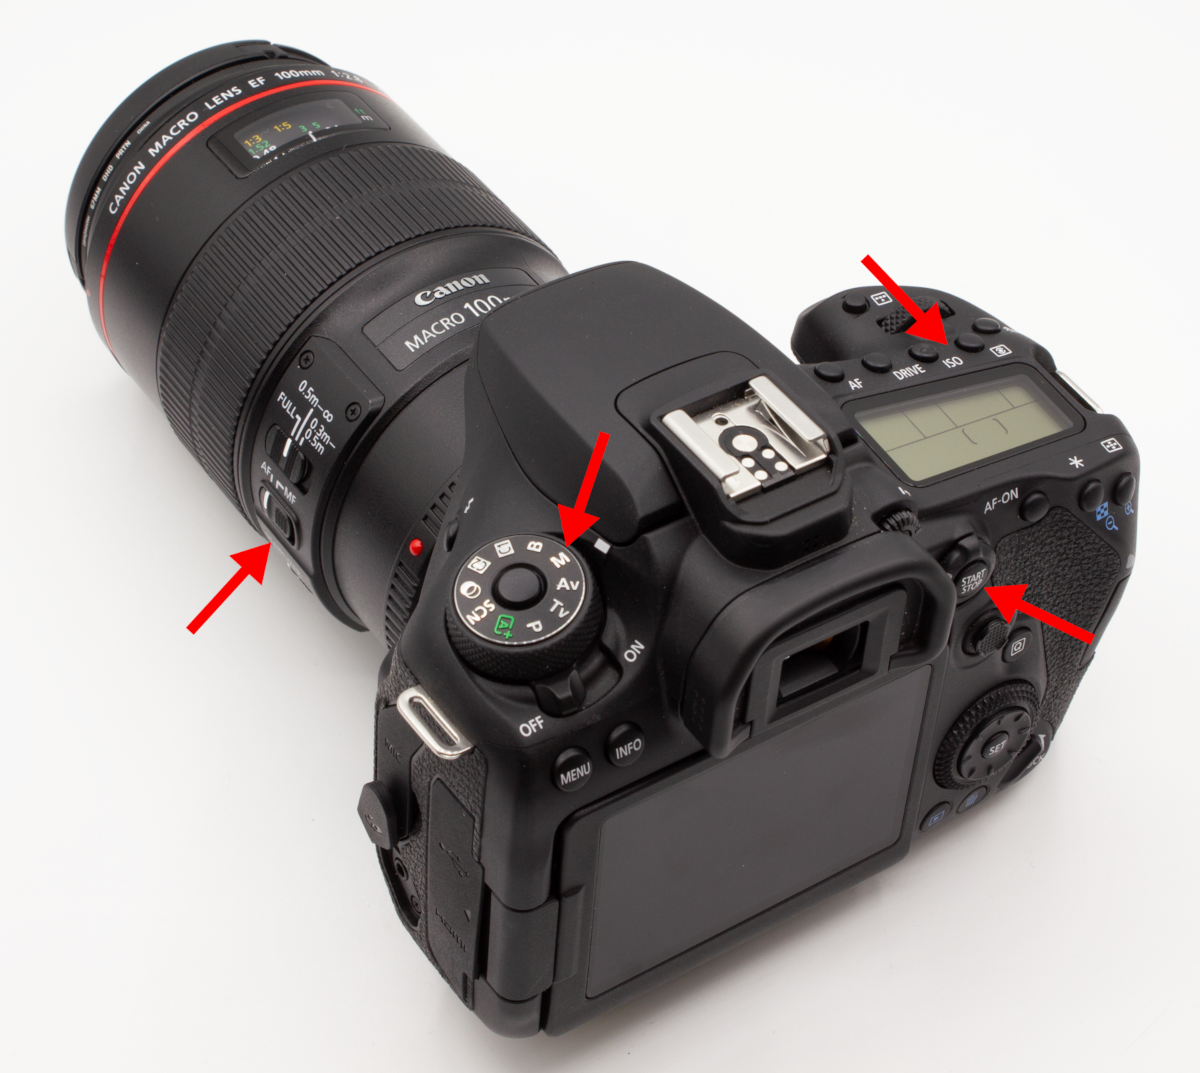
Figure 3.5: Camera (Canon EOS 90D) and lens (EF 100m f/2.8L MACRO IS USM) used to take RAW photos for focus stacking. Arrow on the lens: Focus mode button set to Auto Focus (AF). Arrows on the camera body (from top to bottom): ISO button, Manual Exposure mode dial and “START-STOP” button (for Live View Shooting Mode).
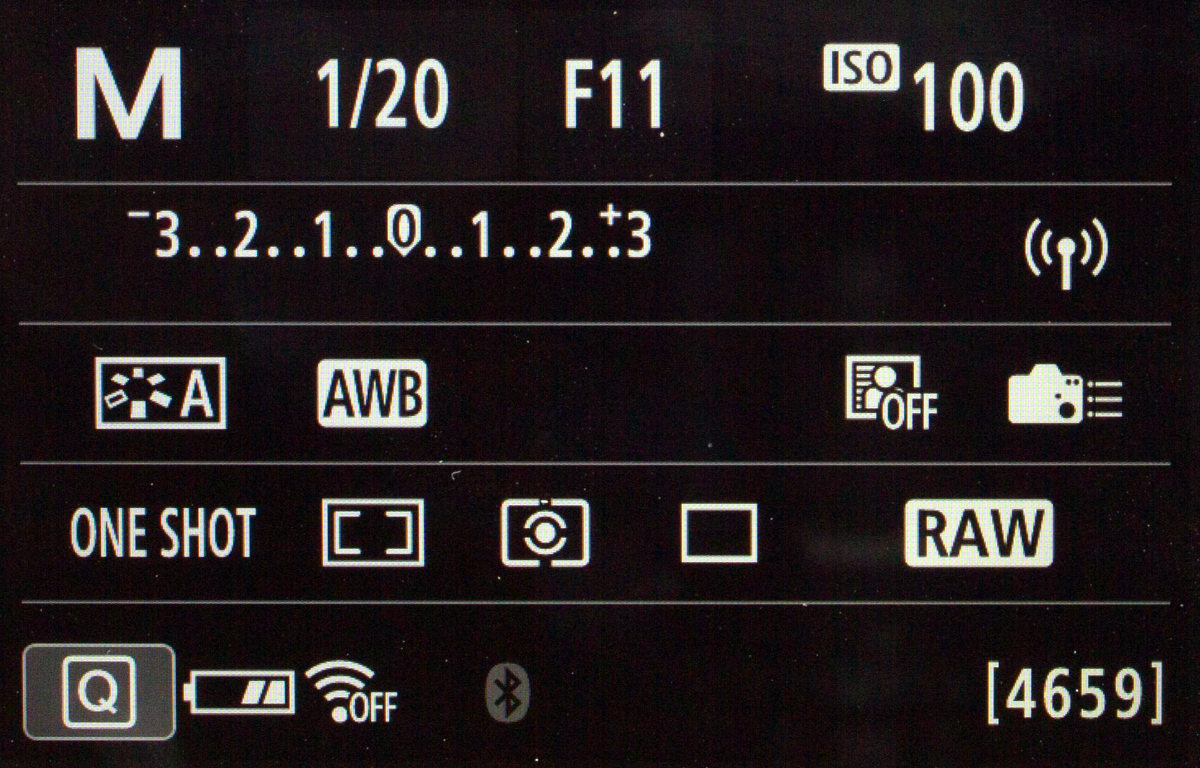
Figure 3.6: Camera settings interface of the Canon EOS 90D, used for projects with focus stacking.
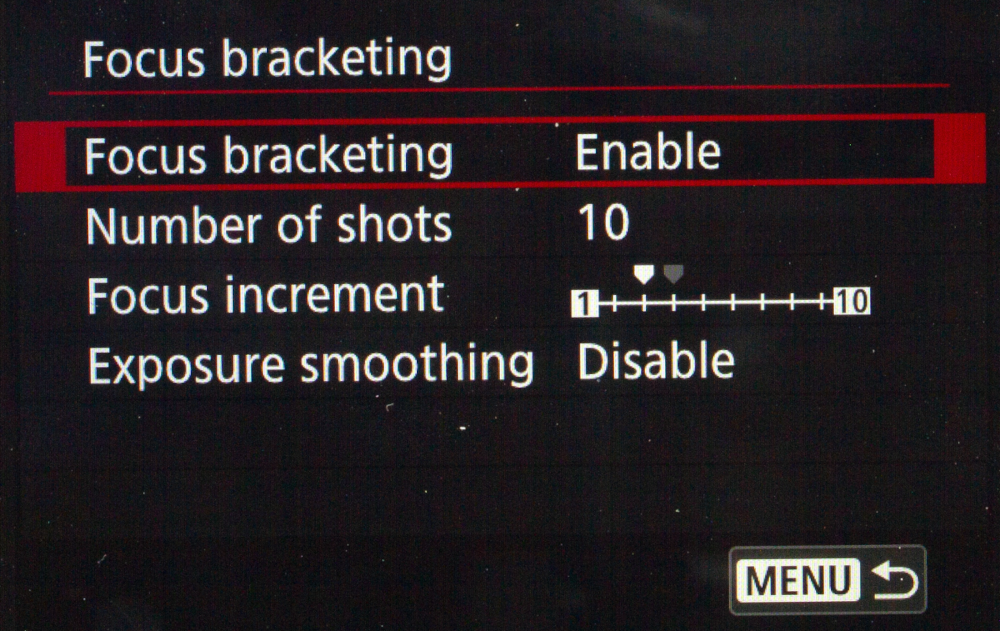
Figure 3.7: Focus bracketing settings of the Canon EOS 90D.
3.1.2 Optional: custom camera white balance
Optionally, you can begin by setting a personalized white balance (WB) in your camera with the light gray scale on the chart:
For a Canon camera, take a picture of the gray scale;
Choose Custom WB in your camera settings (Figure 3.8);
Select Custom and use the picture of the grey scale to define your custome white balance (Figure 3.9). Be careful, you will still require to linearize and calibrate each photo afterwards.
However, the color chart will always be the reference for post-processing the color calibration of each photo. This optional section only helps to have a better preview of the photos.
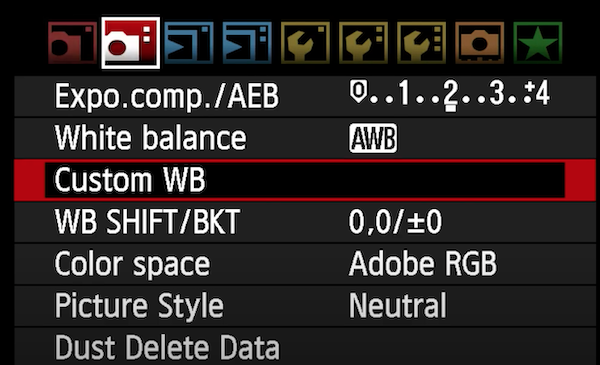
Figure 3.8: Custom whhite balance parameter.
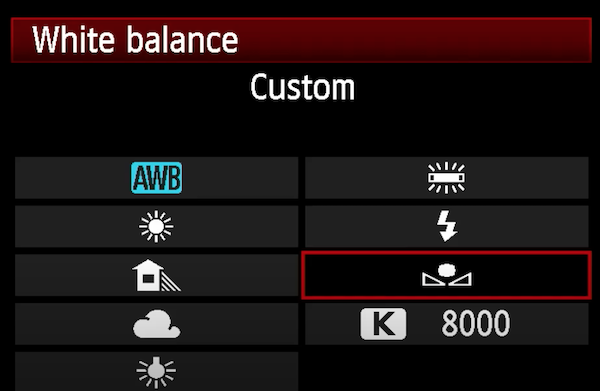
Figure 3.9: How to select a custom white balance.
3.2 Turntable settings and preparation
If not doing focus stacking, for each run (one 360° spin of the turntable), we use a wait time of 2s to allow the camera time to save the images on the SD card after it is triggered, and the flower to stabilize after each rotation. If doing focus stacking, we use a wait time of 6-8s depending on the number of shots and focus increments.
Connect the shutter release to your camera and the turntable Syrp Genie II (Figure 3.10).
Turn the turntable on (to turn it off, hold the on button for 3 seconds).
Connect the Syrp Genie II to your device, and do the updates if required (needs an internet connection).
Make sure the turntable orientation is inverted in the detailed settings (Figure 3.13)
In parameters (Figure 3.14), select 20 photos for each run, and the appropriate amount of waiting time depending on if you are doing focus stacking (6-8s) or not (2s; move-wait-shoot-wait-move). If it is too quick, some pictures won’t be able to be saved as the camera needs a delay to save them on the memory card. The spinning device will take the first picture then proceed to a move-shoot-move run until the last photo.
Place the white background paper disk with the foam block on the turntable to contrast with the flower. If your flower is pale, then use a different background (colored or darker). Ideally, the color of the disk and the foam block should be the exact same as the color of the backdrop in the lightbox as this will help when applying masks later.
Figure 3.10: Camera shutter release port.

Figure 3.11: Camera shutter release port.
Figure 3.12: Camera shutter release port.
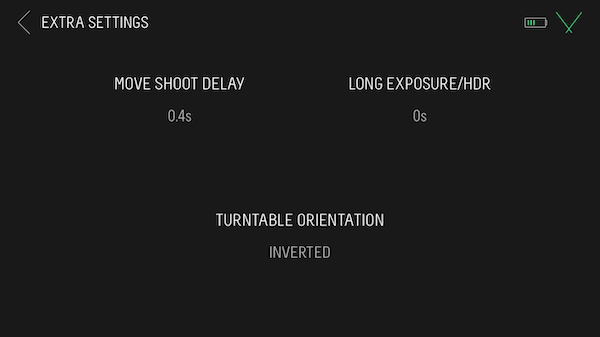
Figure 3.13: Genie detailed settings.
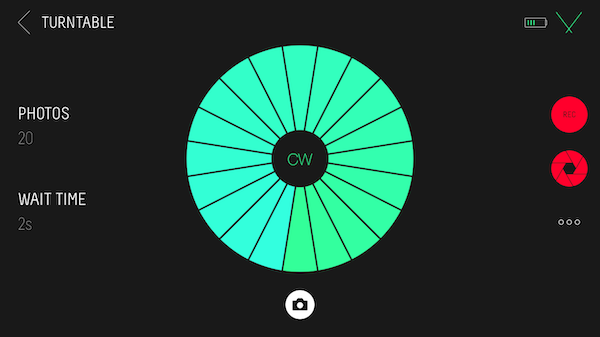
Figure 3.14: Start recording with the turntable.
3.3 Summary of settings
| Parameter | Value |
|---|---|
| Camera settings | |
| Aperture | F/16 (no focus stacking) or F11 (focus stacking) |
| Sensibility | ISO 100 (lowest) |
| Exposure time | 1/20s (depending on light settings) |
| Turntable settings | |
| Number of photos | 20 per camera height (high, mid, low) |
| Wait time | 2s (no focus stacking) or 6-8s (focus stacking) |